moisture meter calibration
Measuring soil moisture accurately is important for many uses, like farming, gardening, and checking the environment. Soil moisture sensors are very important. They give real-time information about how wet the soil is.
This data helps with watering, plant growth, and managing water. However, these sensors can become less accurate as time goes on.
Soil type, temperature, and electrical interference can cause issues. It is important to adjust soil moisture sensors for correct readings. This article will guide you through the steps to calibrate soil moisture sensors.
Understanding Soil Moisture Sensors
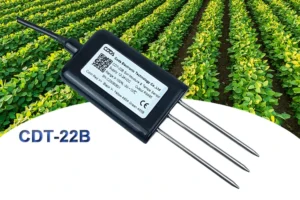
Before starting the calibration process, it’s important to know how soil moisture sensors work. There are different types of moisture sensors. The most common types are capacitance sensors and resistive sensors.
Capacitance-based sensors measure soil moisture. They do this by checking the electrical charge between two electrodes in the soil. The capacitance changes with the soil’s moisture level. Water has a different dielectric constant compared to dry soil.
Resistive-based sensors, on the other hand, measure the electrical resistance between two electrodes. The resistance goes down when the soil moisture goes up. Water conducts electricity better than dry soil.
Both types of sensors make an electrical signal. This signal shows how wet the soil is. The link between the electrical output and soil moisture can change.
This depends on the type of sensor, the type of soil, and other factors. This is why calibration corrections is needed to turn the electrical output into accurate soil moisture readings.
Materials and Equipment Needed
To set up a soil moisture sensor, you will need these materials and tools:
Soil moisture sensor:
Make sure the sensor is clean and in good working condition.
Calibration equipment:
You can use a soil moisture meter, a data logger, or a multimeter. Your choice depends on the type of sensor and the method you use to calibrate the meter.
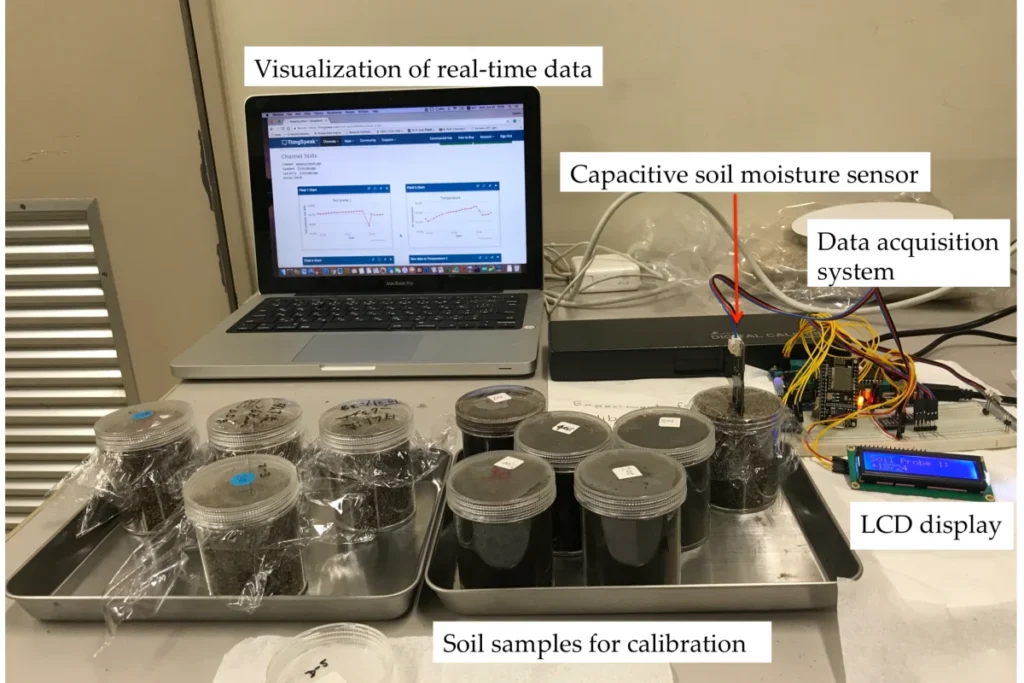
Collect soil samples from the area where you will install the sensor. You need at least two samples. One should be dry, and the other should be saturated.
Containers:
Use clean containers to hold the soil pin meters samples during the calibration ensures process.
Distilled water:
You will need distilled water to soak the soil sample.
Gloves and safety goggles:
Wear gloves and safety goggles. This will protect you from soil contaminants and possible electrical hazards.
Calibration Methods
There are many ways to calibrate soil moisture sensors. The two most common methods are the gravimetric method and the electrical method.
Gravimetric Method
Experts say the gravimetric method is the best way to calibrate soil moisture sensors. To find the water content in soil, weigh the sample before and after drying it in an oven. Here are the steps to calibrate a soil moisture sensor using the gravimetric method:
Collect soil samples from the area where you will install the sensor. Make sure to get at least two samples: one dry and one wet.
Weigh the soil samples: Use a precision balance to weigh each soil sample. Then, write down the initial weight.
Dry the soil samples by putting them in an oven. Set the oven to 105°C. Leave the samples in for 24 hours or until they are fully dry.
Weigh the dried soil samples. After drying, use the precision balance to weigh the soil samples again. Record the final weight.
Calculate the soil moisture content. Use the formula below for each sample:
Soil Moisture Content= Final Weight Initial Weight−Final Weight×100%
Insert the sensor: Place the soil moisture sensor into each soil sample. Then, write down the electrical output.
Create a calibration curve. Plot the sensor’s electrical output against the soil moisture content of each sample. Use a spreadsheet or graphing software to make the calibration curve.
– Calibration check.
– After creating the calibration curve, use it.
– This will convert the sensor’s electrical output into soil moisture readings. Check the sensor readings against the real soil moisture content of the samples to confirm the calibration.
Electrical Method
The electrical method is a quicker and easier way to calibrate than the gravimetric method. You use a soil moisture meter checks or data logger to check the moisture in soil samples. Then, you compare this with the sensor’s electrical output. Here are the steps to calibrate a soil moisture sensor using the electrical method:
Collect soil samples from the area where you will install the sensor. Make sure to get at least two samples: one dry and one saturated.
Check the soil moisture level. Use a soil moisture meter or data logger for each sample. Write down the readings.
Insert the sensor: Place the soil moisture sensor into each soil sample. Then, write down the electrical output.
Built in calibration curve. Plot the sensor’s electrical output against the soil moisture content standard mcs for each sample. Use a spreadsheet or graphing software to make the calibration tests curve.
– Check the calibration.
– After creating the calibration curve, use it.
– This will convert the sensor’s electrical output into soil moisture readings. Check the sensor readings against the real soil moisture content of the samples to confirm the calibration standards.
Tips for Accurate Calibration
Use representative soil samples: Make sure to collect soil samples from the area where the sensor will be installed. The soil samples should be representative of the soil type, texture, and moisture content in that area.
Follow the manufacturer’s instructions. Different soil moisture sensors have different calibration steps. Be sure to follow these instructions closely for accurate calibration.
Calibrate regularly: Soil moisture sensors can become less accurate over time. This can happen due to soil type, temperature, and electrical interference. It’s important to calibrate the sensors often to ensure reliable and consistent readings.
Consider environmental factors. Temperature, humidity, and soil type can affect how well soil moisture sensors work. Keep these factors in mind when calibrating moisture the sensors. Adjust the calibration curve as needed.
Conclusion
Calibrating soil moisture sensors is important for getting accurate and reliable soil moisture readings. To get the best results from your sensor, follow the steps in this article. Use the right calibration method to make sure it fits your needs.
Remember to check the sensors often. Also, think about environmental factors to keep them accurate. With correct soil moisture data, you can make better choices for watering and plant growth. This helps increase crop yields and improve water use.
