How to Use a Noise Meter
In many areas, like factories and city homes, measuring noise levels is important. It helps ensure comfort, safety, and follows the rules. A noise level meter, also known as a sound level meter, is the primary tool for this task. This article will guide you through the step – by – step process of using a noise meter effectively.
Familiarize Yourself with the Noise Meter
Before you start using the noise meter, it’s essential to understand its features and functions. Every model may have slight variations, so carefully read the user manual provided by the manufacturer. The manual will explain details like the measurement range, sensitivity settings, and extra features. These features may include data logging or wireless connectivity.
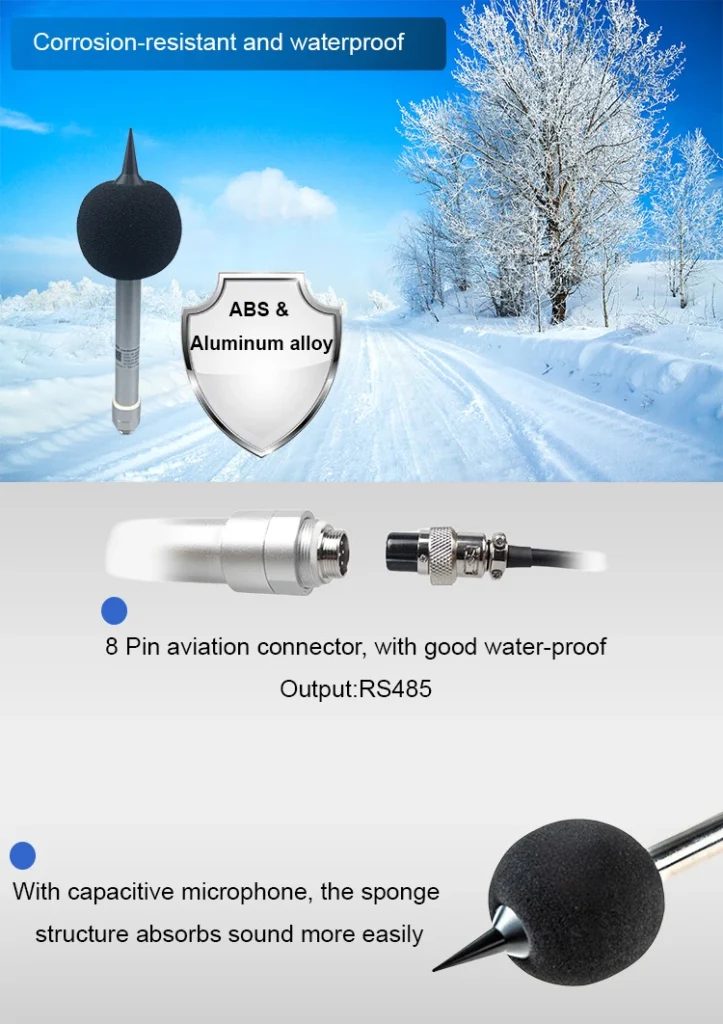
Identify the key components of the noise meter. The microphone is the most critical part, as it captures the sound waves. You usually find it at the end of a probe or on the top of the device. The display screen shows the sound levels. There are buttons to turn the device on and off. You can also select measurement modes and calibrate the device. Understanding these components will make the measurement process smoother.
Prepare the Noise Meter for Use
Once you are familiar with the noise level meter, it’s time to prepare it for measurement. First, turn on the device by pressing the power button. Some noise meters may require a short warm – up period to stabilize their internal components and provide accurate readings. Wait until the display shows a stable baseline reading.
Next, set the appropriate measurement range. Noise meters typically offer different ranges, such as 30 – 130 dB or 50 – 160 dB. Select a range that suits the expected noise levels of your measurement environment. If you are unsure, start with a wider range and adjust it as needed. For example, a quiet library needs a sound level of about 30 dB. In contrast, a construction site may need a level of 130 dB or more.
Also, choose the right measurement mode. The two common modes are “Fast” and “Slow.” The “Fast” mode reacts quickly to changes in sound levels. This makes it good for measuring loud noises, like those from busy traffic. The “Slow” mode averages readings over a longer time. This gives a more stable reading in places with constant but changing noise, like an office with background chatter.
Position the Microphone Correctly
Proper positioning of the microphone is vital for obtaining accurate measurements. Place the microphone at the location where you want to measure the noise. As a general rule, keep a distance of about 1 – 3 feet (0.3 – 0.9 meters) from the sound source. Placing it too close can lead to distorted readings due to the proximity effect.
For example, when measuring noise from a machine, hold the microphone straight and at the right distance. When measuring ambient noise in a room, position the microphone at ear level or at the height where the noise impact is most relevant. Ensure that nothing blocks the microphone. This includes your hand, walls, or furniture. If something blocks it, sound waves cannot reach the device. This can lead to incorrect readings.
Take the Measurement
After positioning the microphone, wait for the reading on the display to stabilize. In places where noise levels change often, it may take a few seconds for the meter to show a steady value. Avoid moving the microphone or making sudden noises during this time to ensure the accuracy of the measurement.
Once the reading has stabilized, record the measured sound level in decibels (dB). Some advanced noise meters let you save readings to internal memory. You can also transfer them to a computer for more analysis. If you take measurements at different places or times, label each one clearly. Include details like the locati0n, time, and any specific conditions of the environment.
Analyze the Results
The final step is to analyze the measured noise level meter. Compare the recorded values with relevant standards or guidelines. For instance, in residential areas, the acceptable noise level at night is usually much lower than during the day. If the measured levels are higher than the recommended standards, it may show a need for noise control. This could include adding soundproofing materials or changing how noisy equipment operates.
If you have taken multiple measurements over time or in different locations, look for trends. An increasing trend in noise levels may suggest a developing noise problem that requires attention. Analyzing the differences between various measurement points can also help identify the sources of high – noise areas.
In conclusion, using a noise meter effectively involves careful preparation, proper microphone positioning, accurate measurement, and thorough result analysis. By following these steps, you can get reliable noise level data. This data is useful for many applications, like environmental monitoring and workplace safety management.