—
Introduction: The Hidden Power of a Simple Tool
Picture this: you’re sipping coffee on a sunny porch, the sky a clear blue canvas. Suddenly, a sudden downpour drenches your garden and leaves a puddle in the driveway. You’ve just experienced a classic “rain surprise.” But what if you could predict that splash, track how much water falls, and even use that data to protect your garden, home, or business? The answer lies in a humble yet powerful device: the outdoor rain gauge.
While weather apps and satellite data give you forecasts, a rain gauge gives you real-time, site‑specific precipitation data. Whether you’re a hobbyist gardener, a farmer, a homeowner worried about flooding, or a climate science enthusiast, mastering rain gauge basics can transform how you understand and respond to the weather. In this post, we’ll dive deep into the world of outdoor rain gauges—explore why they matter, how to pick the right model, step‑by‑step installation, maintenance secrets, and even how to integrate them into a smart home or data‑logging system.
Let’s turn those unexpected showers into actionable insights!
1. Why You Need a Reliable Outdoor Rain Gauge
1.1 Precise Data for Better Decision‑Making
- Gardening & Agriculture: Knowing exact rainfall amounts helps you time irrigation, prevent overwatering, and reduce runoff.
- Flood Prevention: Accurate precipitation data lets you monitor storm intensity and issue early warnings for your property.
- Water Resource Management: For small farms or community water systems, a gauge informs reservoir refill schedules and conservation efforts.
- Climate Research: Even a single gauge contributes to local climatology studies, helping track long‑term trends and validate weather models.
1.2 Beyond the Forecast
Weather apps rely on satellite or radar data that can miss micro‑climates. A rain gauge, positioned right on your property, captures your rain, not the generic region. This distinction matters when you’re dealing with micro‑climates—like a shaded garden spot that receives less rain than the surrounding area.
1.3 DIY Satisfaction
Installing a rain gauge is a low‑cost, low‑effort project that adds tangible value to your home or garden. Plus, it’s a great conversation starter at gatherings—“Did you know we can measure exactly how many millimeters fell today?”
—
2. Choosing the Right Rain Gauge for Your Needs
2.1 Types of Rain Gauges
| Gauge Type | How It Works | Best For | Pros | Cons |
|————|————–|———-|——|——|
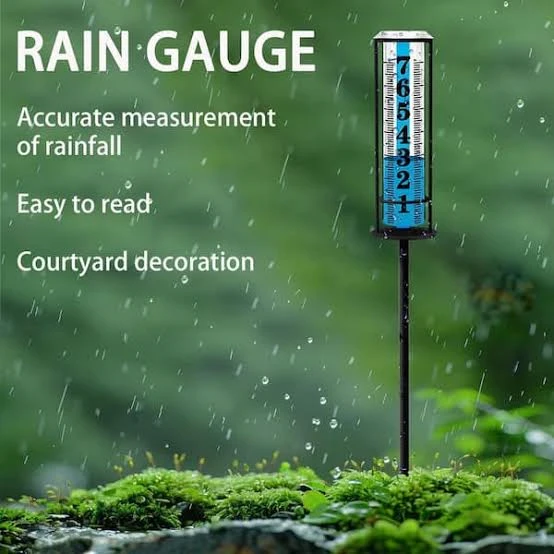
| Standard (Cylindrical) | Water collects in a funnel, measured by a graduated cylinder | General use, home gardens | Simple, inexpensive, accurate | Requires manual reading |
| Tipping Bucket | Water fills a tiny bucket; each tip records a set volume | Weather stations, automated logging | Automatic, precise, digital readouts | More expensive, can be affected by wind |
| Weighted or Mechanical | Water weight measured via a sensor | Scientific research, high‑precision needs | Very accurate, long‑term data | Complex, costly |
| Digital/Smart Gauges | Wireless data transmission, often paired with smartphone apps | Tech‑savvy users, integrated weather stations | Real‑time alerts, data logging | Higher price, battery maintenance |
2.2 Key Features to Compare
- Measurement Accuracy: Look for gauges with ±2% accuracy or better. Tipping buckets typically offer 0.01 mm resolution.
- Range: Ensure the gauge can handle the maximum rainfall expected in your region (e.g., tropical areas may need gauges that measure up to 500 mm per storm).
- Wind Resistance: Wind can skew readings. Choose a gauge with a wind‑shield or a design that minimizes wind impact.
- Ease of Installation: Some models come with a mounting kit; others require a pole or bracket.
- Data Connectivity: If you want real‑time alerts, opt for gauges with Bluetooth, Wi‑Fi, or cellular connectivity.
2.3 Budgeting
- Budget (≤$50): Standard cylindrical gauges or basic digital models.
- Mid‑Range ($50–150): Tipping bucket gauges, smart gauges with basic app integration.
- Premium (> $150): High‑accuracy weighted gauges, professional weather station kits.
—
3. Step‑by‑Step Installation Guide
3.1 Selecting the Ideal Spot
1. Open Area: Avoid trees, buildings, or windbreaks that could block rainfall.
2. Level Ground: Ensure the gauge sits on a flat surface or mount it on a sturdy pole.
3. Wind Protection: If wind is a concern, position the gauge 1–2 m away from structures that can create turbulence.
4. Accessibility: Keep the gauge within easy reach for readings or maintenance.
3.2 Mounting a Standard Cylindrical Gauge
| Step | Action |
|——|——–|
| 1 | Prepare the mounting base – use a concrete footing or a heavy metal plate. |
| 2 | Attach the funnel – secure it with screws or a clamp. |
| 3 | Insert the graduated cylinder – ensure it’s upright and free of obstructions. |
| 4 | Add a wind shield – a simple plastic or metal hood can reduce wind bias. |
| 5 | Test for leaks – run a light rain simulation to confirm no water escapes. |
3.3 Installing a Tipping Bucket Gauge
1. Mount the Sensor: Use the provided pole or bracket. The sensor should be at ground level, facing down.
2. Connect the Data Logger (if separate): Follow the manufacturer’s wiring instructions.
3. Calibrate: Some models require a calibration step—usually a simple water volume test.
4. Check Wind Shield: Many tipping buckets include a built‑in shield; if not, add one.
3.4 Smart Gauge Setup
1. Power On: Insert fresh batteries or connect to a power adapter.
2. Download the App: Most smart gauges use a dedicated smartphone app.
3. Pair Device: Follow on‑screen instructions to connect via Bluetooth/Wi‑Fi.
4. Set Alerts: Configure rainfall thresholds (e.g., “Notify me after 10 mm of rain”).
5. Test Connectivity: Verify that data appears in the app within minutes of a light drizzle.
—
4. Maintaining and Calibrating Your Gauge
4.1 Routine Cleaning
- Monthly: Remove leaves, debris, and any buildup that could clog the funnel or bucket.
- After Storms: Inspect for cracks or loose parts; replace if necessary.
- Seasonal: In winter, ensure no ice forms inside the gauge. Use a heat‑resistant plastic sleeve if your area experiences freezing temperatures.
4.2 Calibration Checks
- Standard Gauges: Fill the cylinder with a known volume (e.g., 10 mL) and compare the reading. Adjust if there’s a discrepancy.
- Tipping Buckets: Run a known volume of water through the sensor and count the tips. Each tip should correspond to the manufacturer’s specified volume (commonly 0.2 mm per tip).
- Digital Gauges: Most come pre‑calibrated, but software updates may refine accuracy. Keep firmware up to date.
4.3 Troubleshooting Common Issues
| Symptom | Possible Cause | Fix |
|———|—————-|—–|
| No Reading | Power failure or battery dead | Replace batteries or check power supply |
| Low Accuracy | Wind interference | Add or adjust wind shield |
| Missing Tips | Clogged sensor | Clean the tip mechanism |
| Data Lag | Poor connectivity | Re‑pair device or move closer to Wi‑Fi router |
—
5. Advanced Tips: Integrating with Smart Home & Data Logging
5.1 Connecting to a Home Weather Station
- Weather Station Kits: Many kits include a rain gauge, wind vane, and temperature sensor. They can sync with your home hub (e.g., SmartThings, Home Assistant).
- Data Visualization: Use dashboards to plot rainfall against temperature, humidity, or soil moisture. This can guide irrigation schedules automatically.
5.2 Cloud‑Based Data Logging
- Free Platforms: Weather Underground, OpenWeatherMap, or personal servers can log data for long‑term analysis.
- Custom Scripts: With a Raspberry Pi or Arduino, you can pull gauge data and push it to a Google Sheet or database for custom analytics.
5.3 Automation Ideas
- Irrigation Control: Trigger a smart irrigation system to pause when rainfall exceeds a threshold.
- Flood Alerts: Combine gauge data with rainfall intensity to trigger flood warning notifications to your phone.
- Gardening Apps: Sync gauge data with apps like Plantix to recommend watering based on actual precipitation.
—
Conclusion: Key Takeaways
- Rain gauges give you exact, site‑specific precipitation data—essential for gardening, flood prevention, and climate research.
- Choose the right gauge by considering type, accuracy, wind resistance, and connectivity. For most homeowners, a tipping bucket or smart gauge strikes the best balance between precision and convenience.
- Installation is straightforward: pick an open spot, mount securely, and test for leaks or wind bias.
- Regular maintenance and calibration keep your gauge accurate and reliable. A quick monthly clean can save you headaches later.
- Integrate with smart home systems for real‑time alerts, automated irrigation, and data logging that can inform long‑term decisions.
By investing a little time and effort into setting up an outdoor rain gauge, you gain a powerful tool that turns every drop into actionable insight. Whether you’re a passionate gardener, a cautious homeowner, or a budding meteorologist, the knowledge of how much rain actually falls on your property is a game‑changer. So, grab a gauge, mount it, and let the data start flowing—rain or shine, you’ll always be ready.
—